

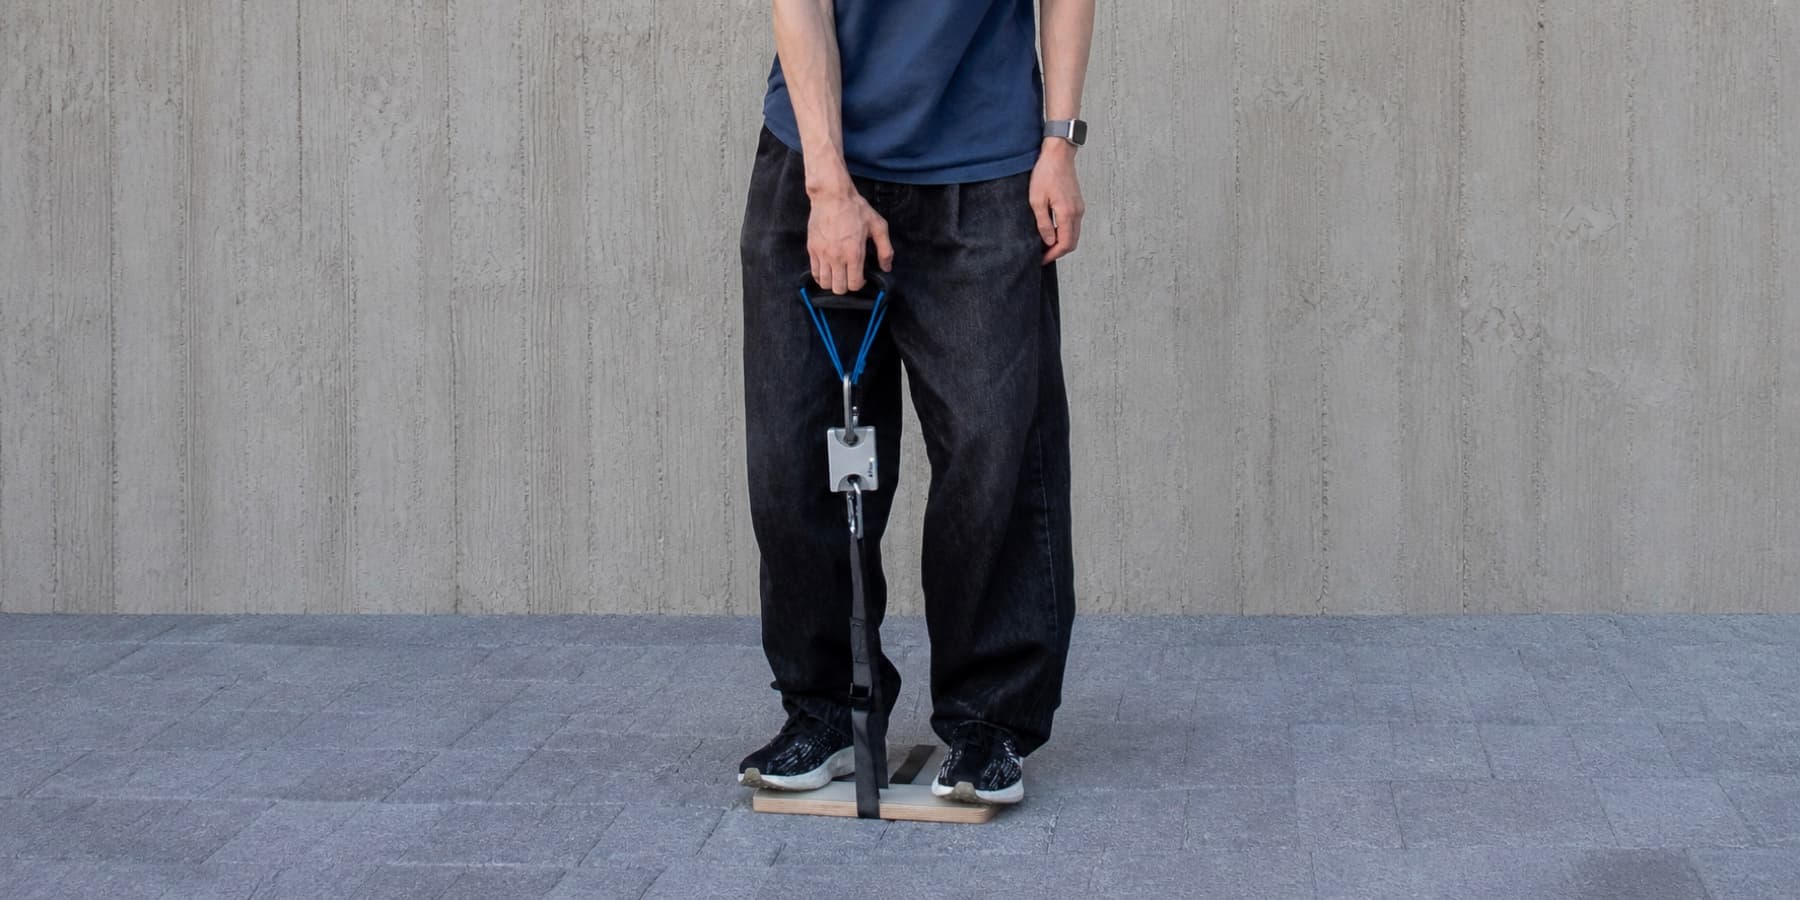
This guide covers a lifting-style Overcoming Isometric setup such as the Frez Essential Kit. You stand on the platform, fix the strap length, and pull upward against resistance that does not meaningfully move. If you are new to this type of contraction, start with our guide to isometric training.
The cover photo above shows the platform, strap, force sensor, and hand position used in this lifting setup.
Passive Pull and Active Curl both start in the same 90-degree half crimp. In Passive Pull, the legs and body initiate force and the fingers resist opening; in Active Curl, the fingers initiate force while the legs resist the downward reaction.
The difference is the direction in which you organize force, not a different starting grip or a larger finger movement.[1][2]
How to perform Passive Pull
Passive Pull begins with a fixed 90-degree half crimp. The legs and torso then create force, which travels through the shoulder and arm toward the fingers, while the fingers work hard to keep the grip from opening.[1][2]
Setup
Use a stable platform, a fixed strap, a force sensor or load cell, and an edge depth you know well. Set the strap length so you can pull without shrugging, twisting, or changing your planned elbow angle. Place both feet and any opposite-hand support where you can reproduce them.
Set the fingers to a 90-degree half crimp before loading the system. Decide the thumb position and keep the wrist, elbow, shoulder, and torso still. Begin below maximum effort so you can check the sequence.
Steps
- Place the chosen fingers on the edge and form a 90-degree half crimp.
- Keep that finger angle fixed and push through the feet.
- Let force travel from the legs through the torso, shoulder, and arm to the hand.
- As force rises, resist the grip opening. Do not change the starting angle to chase a higher number.
- Hold for the planned duration, then reduce force smoothly.
What it should feel like
You should feel the floor push traveling upward through the body while the fingers stop the half crimp from opening. Passive does not mean relaxed fingers. They are actively resisting the transmitted force, much as they resist an existing load during a hang.
Common mistakes
- Pulling hard with the body before the grip is set, so the fingers open suddenly.
- Treating
Passiveas loose or inactive fingers. - Initiating with the fingers, which changes the force sequence toward Active Curl.
- Moving the feet, elbow, torso, or opposite hand between attempts.
- Jumping straight to maximum effort before checking the ramp and position.
When to use it
Use Passive Pull when you want to practise or record how force generated by the body is transmitted to a fixed finger position. The number reflects the whole setup and the body's contribution, not the fingers in isolation.[2]
How to perform Active Curl
Active Curl also begins—and remains—in a 90-degree half crimp. The fingers initiate force from that fixed position, and the legs resist the resulting downward force.[1][2]
Setup
Keep the same platform, strap, sensor, edge, and body geometry used for comparable trials. Set the edge where you can apply finger force without first driving through the legs. Form the 90-degree half crimp before the attempt; Active Curl does not start with open fingers.
Use the feet and torso to hold position, not to start the pull. Keep the chosen finger count, thumb, wrist, elbow, and shoulder positions unchanged.
Steps
- Place the fingers on the edge and form the same 90-degree half crimp.
- Without pushing first through the feet, initiate force with the fingers.
- Increase force while maintaining the original finger angle.
- Let the legs resist the downward reaction so the body stays in place.
- If the 90-degree angle starts to open, the strategy is transitioning into Passive Pull. To measure Active Curl alone, release, reset, and begin again.
What it should feel like
The fingers lead. Their force presses the body toward the floor, and the legs oppose that reaction without initiating the effort. The half-crimp angle stays visibly unchanged throughout.
Common mistakes
- Pulling first with the arm, torso, or legs and performing a Passive Pull instead.
- Letting the 90-degree angle open as force rises.
- Changing the task into extra finger flexion rather than holding the same half crimp.
- Shifting the thumb or wrist during the effort.
- Varying leg or torso assistance to improve the reading.
- Treating a lower result as proof that the fingers are weak.
When to use it
Use Active Curl to practise and record finger-initiated force from a fixed 90-degree half crimp. It is a distinct coordination protocol, not a better or worse version of Passive Pull.
Compare the two in 30 light seconds
This is a coordination drill, not a maximum-force test. Choose a comfortable setup and use only enough force to keep the positions clear. Stop immediately if you feel pain or discomfort.
- 10 seconds, Passive Pull: Set the grip, push through the feet, and resist the fingers opening.
- 10 seconds, rest: Shake out the hand while keeping the equipment and body setup available.
- 10 seconds, Active Curl: Do not drive with the feet first. Initiate with the fingers and maintain the 90-degree half crimp.
In the first effort, notice feet → body → fingers. In the final effort, notice fingers → body → legs. Keep the load light enough that you can identify the sequence.
Keep the records separate
Passive Pull includes force transmitted from the legs and body. Active Curl records a finger-initiated strategy from the same fixed grip. The values therefore answer different protocol questions.
Do not subtract one result from the other, turn them into a ratio, or compare either value with a supposed universal normal ratio. Compare each method only with your previous records from that same method and setup.
Standardize before you compare
A repeatable protocol matters more than a single impressive reading. Record these conditions:
- Protocol: Passive Pull or Active Curl.
- Edge depth, edge shape, surface, and orientation.
- Grip type and the exact 90-degree half-crimp position.
- Finger count and thumb position.
- Wrist, elbow, and shoulder positions.
- Foot position, torso position, and opposite-hand support.
- Warm-up, start cue, force ramp, effort duration, and rest.
- Chosen metric, such as peak force, average force, or rate of force development.
Consistency is central to interpreting repeated climbing finger-strength tests.[3] For help choosing the purpose and metric, see the MVC guide and RFD guide. The safe hangboard training guide offers broader load-management context.
Connect measurement to repeatable training with Frez
Frez is not only a place to see a measurement. Its value is connecting a clearly named protocol with repeatable isometric training and a trend you can review under the same conditions.
Use stable labels such as:
Passive Pull — resist transmitted force from a 90-degree half crimp.Active Curl — initiate finger force from a 90-degree half crimp.
Save the edge, grip, limb positions, duration, ramp, rest, and metric with the result. Then compare Passive Pull with earlier Passive Pull sessions and Active Curl with earlier Active Curl sessions. The useful question is whether the same protocol is changing over time.
Sources
[1] StrengthClimbing — The Best Finger Strength Protocol for Rock Climbing
[2] C4HP / Tyler Nelson — Finger Strength Training 4 Rock Climbing
[3] Pérez-Cordero et al. 2025 — Reliability of finger strength assessment methods in climbing
